When considering a home water filtration system, understanding your options, costs, maintenance needs, and lifespan is key to making the right decision.
Here's a detailed breakdown of the most popular home water filtration systems:
At WaterSmart, we’ve been guiding homeowners through this process since 1994—helping them select, install, and maintain water filtration systems that improve water quality and save money long-term.
Contact us today to tap into our expertise.
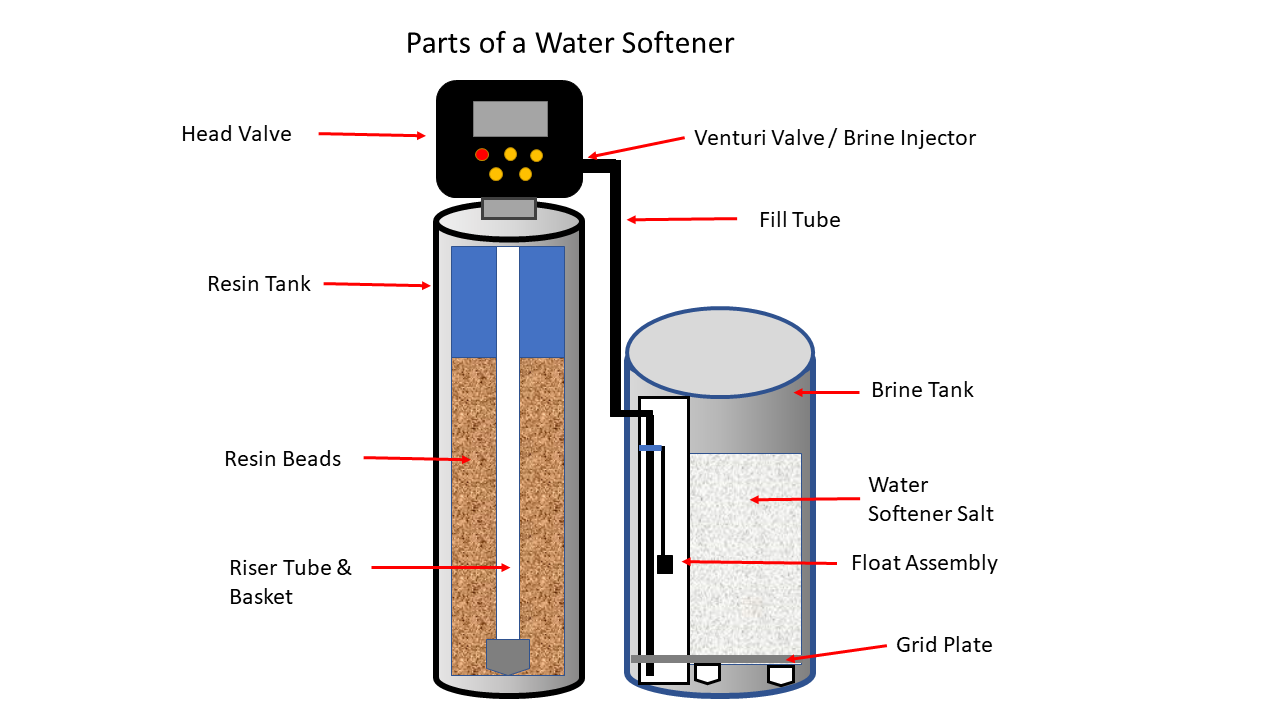
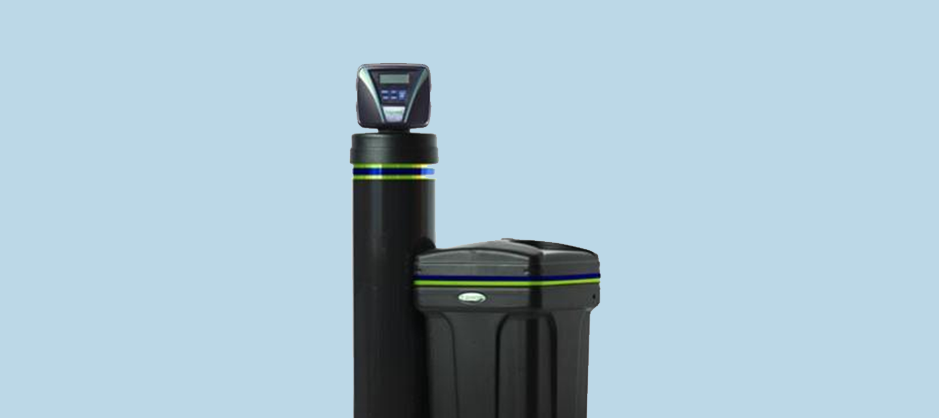
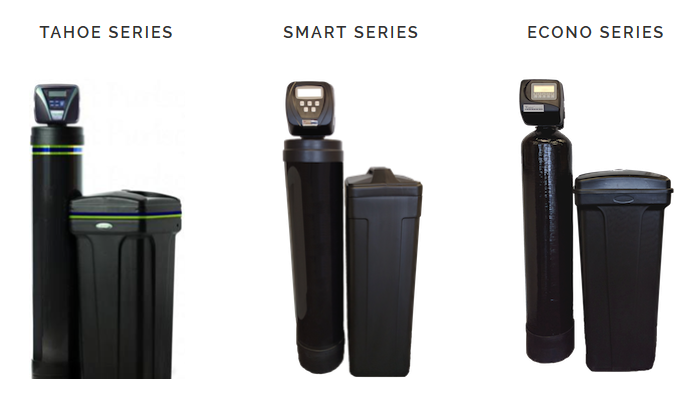
1. Water Softeners
Average Cost (2025): $1,000 - $3,000
Installation: Requires professional installation into the main water line to ensure even treatment across the household.
Life Expectancy: 10 to 15 years, depending on water usage and maintenance.
Maintenance: Refill with salt every 4–8 weeks and schedule an annual check-up.
Water softeners are designed to remove calcium and magnesium, two minerals commonly found in hard water. These minerals can cause a build-up in your pipes and appliances, leading to long-term damage and inefficiency.
By eliminating these minerals, water softeners extend the lifespan of your appliances and help you use less soap and detergent in daily cleaning.
The primary drawback is the need to replenish salt regularly, which adds to the ongoing cost. The more water your household uses, the more often salt must be added.
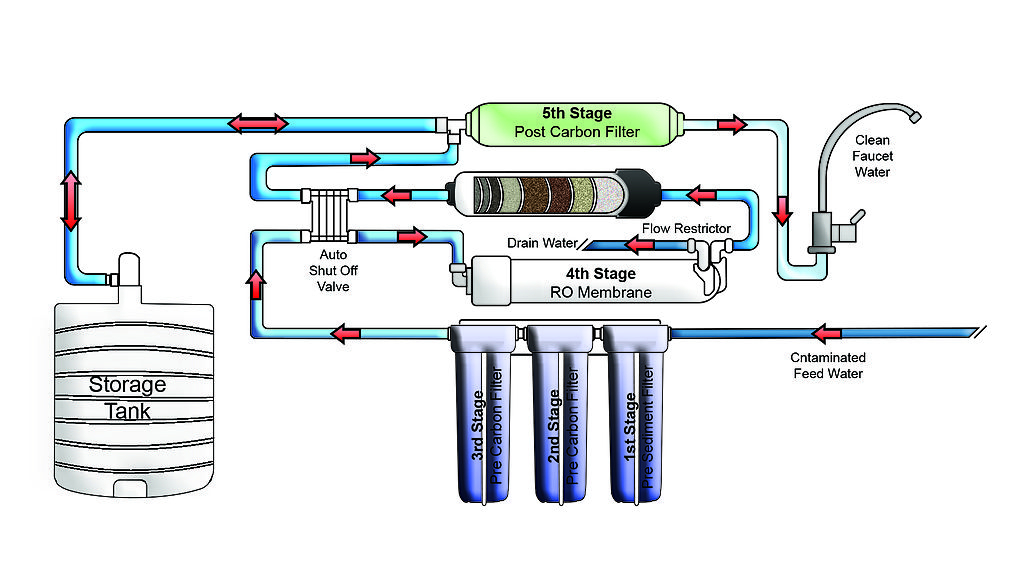
2. Reverse Osmosis (RO) Systems
Average Cost (2025): $150 - $4,800
Installation: RO systems can be installed under sinks or as whole-home solutions. Professional installation is recommended, especially for larger units.
Life Expectancy: 10 to 15 years. RO membranes typically require replacement every 2–3 years.
Maintenance: Filter replacement every 6–12 months and annual sanitation.
Reverse osmosis systems force water through a semipermeable membrane, removing a wide range of contaminants such as heavy metals, nitrates, chlorine, and even certain bacteria.
This produces cleaner, better-tasting water that won’t contribute to scale in kettles or coffee makers.
While they offer thorough filtration, RO systems are more expensive upfront and use more water than other types.
Additionally, membranes and filters must be replaced regularly for optimal performance.
3. Fridge Filters
Average Cost (2025): $1,600 - $8,000 (includes refrigerator) | $30 - $100 (replacement filters)
Installation: Installed as part of your refrigerator unit. Connection to a water line is required.
Life Expectancy: The filter itself lasts 1–3 months, while the fridge may last 8–15 years.
Maintenance: Replace filters approximately every 1–3 months based on usage.
Fridge filters work by running tap water through activated carbon, which traps impurities and contaminants. It’s a simple, convenient option for families who want fast access to cold, filtered water.
The main downside is the upfront cost of purchasing a fridge with a built-in water filter and the limited range of contaminants it can remove compared to RO systems.
4. Tap Filters
Average Cost (2025): $20 - $100
Installation: Easy to install without professional help. Designed to attach to most standard faucets.
Life Expectancy: 1–2 years for the housing unit.
Maintenance: Replace internal filters every 1–3 months.
Tap filters are a cost-effective way to reduce chlorine, lead, and other contaminants. They are ideal for renters or people who want an easy-to-install solution without modifying plumbing.
However, they can be bulky and visually unappealing. Some may not fit all faucets, especially handheld or spray units. Reduced water pressure is also a common complaint.
5. Simple Pitcher Filters
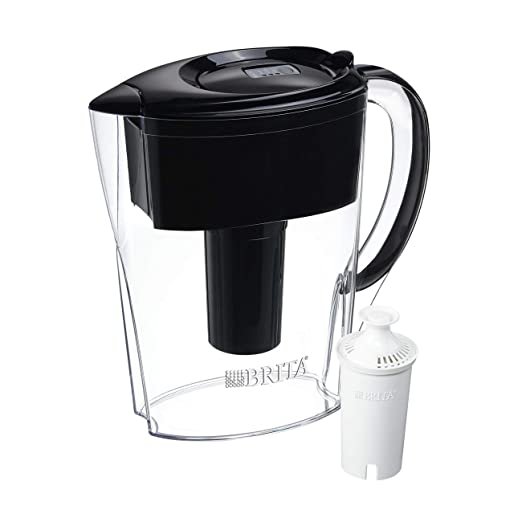
Average Cost (2025): $20 - $80 | $6 - $10 for replacement filters
Installation: None needed. Fill with tap water and refrigerate.
Life Expectancy: 1–2 years for the pitcher; filters should be replaced monthly.
Maintenance: Replace the filter approximately every 30 days.
Pitcher filters - like Brita, for example - are easy to use and affordable. They work by passing water through a carbon filter that reduces chlorine and sediment. With no installation required, they are perfect for dorms, offices, and small households.
That said, they have a limited capacity and require you to wait as the water filters through. Frequent refilling and filter replacement can become inconvenient over time.
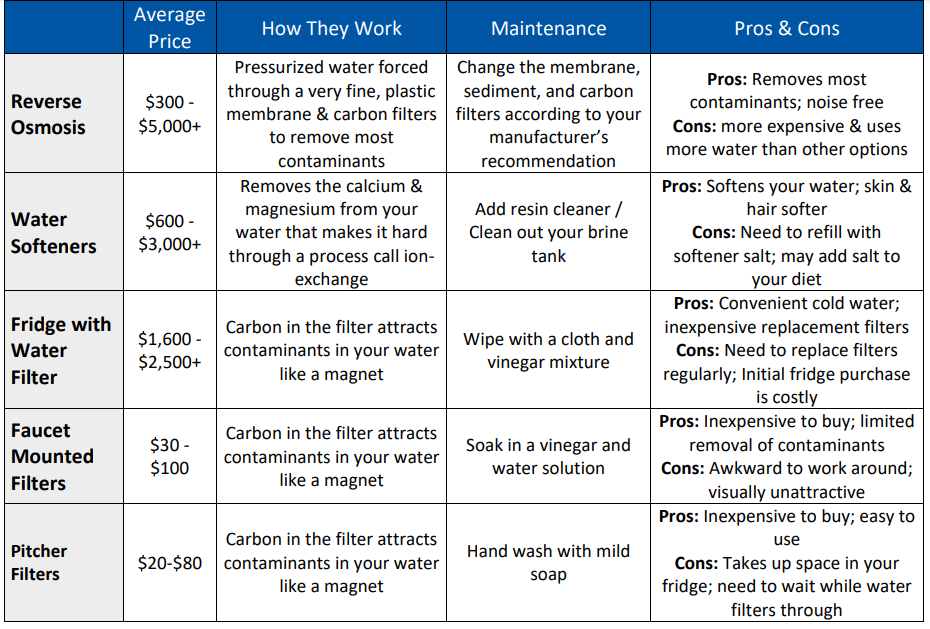
Here’s a handy chat for your reference when trying to make a home water filtration decision.
How WaterSmart Supports You
Since 1994, WaterSmart has helped homeowners in Kitchener, Waterloo, Cambridge, Guelph, Brantford, and surrounding areas choose and maintain water filtration systems tailored to their needs.
Our expert team will:
Test your water to identify specific issues.
Recommend the best solution based on your household’s size, water source, and goals.
Install your new system professionally and efficiently.
Provide ongoing service, including salt delivery, filter changes, and repairs.
Answer all your questions and show you how to get the most from your system.
We’re local, experienced, and dedicated to improving your water quality.
Contact us today to get started.
“The installation was done very efficient. No messes, went through the operation of the water softener. Friendly and honest. I would recommend to everyone.”